Front Suspension Rebuild
Back in the summer of '99 one of the front shocks on the red Coupe decided to start pumping it's oil out, so very soon I was left with a very badly handling front end. After weighing up the options I decided to replace the front shocks with OEM Audi ones as they were very competitive on price and I didn't really want to go any stiffer as the suspension in my opinion is stiff enough already. In addition to this and after a good look at the rubber bushes, top mounts, track rod ends, bumpstops / dust boots and A arm bushes it was decided to replace these as well. I did in fact carry out the shock replacement first, and then the bushes later on. But in hindsight it makes sense to do the whole lot at once as you got to take it all apart anyway.
Tools you will need are a good range of metric sockets, spanners, breaker bar, good quality water pump pliers, special tool for undoing the nut on top of the shock, coil spring compressors, 17mm / 22mm cranked ring spanners, track rod end splitter and a puller that bolts onto the wheel bolts to push the drivshaft out. I ended up hiring the coil spring compressors and the puller for pushing the driveshaft out, the cost was not high to do this compared with buying them.
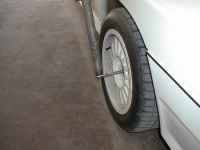
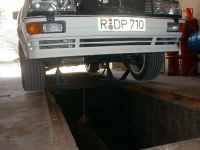
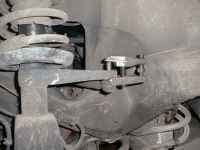
To start with it is worth spraying all the nuts and bolts with penetrating oil the day before you want to do this and spray them well. First thing you need to do is with the car stillon the ground loosen the driveshaft nut on each front axle as well as the wheel bolts, next put the car in gear with the handbrake on and jack up the car supporting it with axle stands under the A pillar, this should give you a nice solid safe car to work under, using the tyre jack is no good for this sort of work! Remove the wheels and as an extra precaution place them just to the rear of the axle stands under the sill. Working under the car disconnect the anti roll bar from the sunframe and A arm and place it to one side with it's bolts and washers etc. Next is to remove the ball joint retaining nut and bolt, whatever you do DO NOT prise the clamp apart that the bolt runs through, it is ok to lever the ball joint down, it's best at this stage to undo the A arm from the subframe, for this you will need a cranked 17mm ring spanner to hold the nut inside the subframe whilst turning the bolt head, a little tip is to tape up the side if the 17mm end that is not going over the nut, this is to stop the nut from falling into the subframe. Now remove the A arm and mark it so you know whether it is left or right and which way up it fits, helps later on.
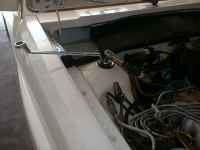
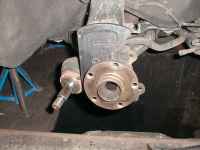
Working inside the engine bay you now need to loosen the the strut top mounting nut for this I used another cranked ring spanner 22mm this time, to get down into the strut give enough clearance over the turret, you will also need a 6mm or 7mm allen key to stop the shocks piston from turning whilst undoing the nut. Leave the nut on by a few threads. Now using the track rod end splitter remove the track rod from the strut, remove the brake caliper and pads, undo the driveshaft nut and with the hub puller push out the driveshaft, the strut is now floating around with nothing else attached to it, right????? Ok now get a trolley jack or assistant to support the strut whilst you undo the last remaining turns of the top mounting nut, be warned the strut is heavier than you think. Now it should be free to take off the car and place on your work bench for the next stage. Have well earned break.
Disassembling the strut is best done if you have a large bench vice to hold it in leaving you both hands free to work, a word of caution before you start, i manged to drop the whole strut complete with brake disc onto my big toe, and it bloody well hurts let me tell you. If you have steel toe capped boots or shoes wear them! First of all get the spring compressors and fit them over the coil springs and tension them so that they do not move, next get the special tool for undoing the nut that is sunk into the strut top mount and your 6mm or 7mm allen key to hold the shock piston ( you will notice that the special tool has two prongs on it that engage into the nut on the shock). Now lossen it off a few turns, then compress the spring until it moves in situ, now unscrew the nut and remove the top mount, (best thing to do here is to lay everything out in the order it somes off the strut and the retaining washer for the spring, remove the spring and place carefully to one side and mark which end is the top.
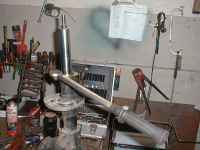
We now have a bare strut with which to work, there is a special tool available to remove the ring that holds the shock inside the tube, however i found that by using a good quality pair of large water pump pliers (10 inch handles) i was able to loosen it off with these along with a lot of WD40 and some vice grips squeezing the handles of the pump pliers onto the ring. Mine were particularly rusty though. Now unscrew the ring and pull the shock out. Re assembly is basically the same but in reverse , some people do put a little oil in the bottom of the strut before inserting the new one, don't know why though. Don't forget to put your new bump stop, dust boot and top mount on during the reassembly phase. I found it easiest to uncompress the spring after I had tighten the nut into the new top mount, DO NOT hold the piston of the shock with pliers or anything that will damge it's surface. With the strut now reassembled push it up into it's mounting point and screw on the nut and dished washer,next connect the driveshaft and spin the nut on loosely, connect the track rod also.
At this stage if you are going to replace the A arm bushes and rollbar bushes then now is the time to do it. Starting with the A arm first there are 3 bushes on the arm that need to be done, two have a steel outer casing one in the middle that rollbar link rod goes onto does not. This bush is relatively easy to do, all you do is cut the old one out with a sharp knife and push the new one in with a flat bladed screwdriver, it may take some pushing but they do just "pop" in. Next onto the big bushes, best way I found to get these out was to get a power drill (cordless is no good not enough power) and a 5mm or 6mm drill bit and drill lots of holes around the rubber part of the bush, then twist it out with some vice grips or big pliers ( it will be hot so be careful). The next stage is to get the rest out, this is easy, all you do is get a hacksaw and carefully make two cuts through the old steel ring of the bush and knock it out with a hammer and chisel, don't cut into the arm though.
Installing the new bushes you will need to find either someone who will press them in for you or if you have a big enough bench vice then it is possible to diy. You will ned two metal tubes, one to fit over the front of the bush and one to go behind where it is being pushed into, I found scaffold pole to be ideal. Now place the bush in the arm and position the metal tubes where I just described, put the whole lot in the vice and squeeze it in. It does take some force to get it in but does work. Now go ahead and do the other one
Next on the list is the roll bar bushes, the rollbar has two types of bush, one on the bar end and one in the middle, the middle ones are easy and jsut pull off, the ones on the end need to be cut off and the new ones pushed back in with flat bladed screwdrivers, these are real tight and a pain to do. You will need to reuse the steel tubes inside the bush also, best way to get these in is to pull them through with a suitable sized nut bolt and washers.
Now that all the bushes have been replaced you need to re attach the A arm and balljoint ( I would use a new a new nut and bolt for the balljoint), push home the driveshaft and hand tighten the nut, attach the rollbar and it's link rod onto the A arm, replace the pads and caliper and finally the wheels.
The final stage is with the full weight of the car on the ground, ( best thing here is drive on ramps) you need to tighten all the bolts up, start in the engine bay first and do the top mount nuts, then the wheel nuts and driveshaft nuts, A arms next, roll bar, track rod ends etc. Only when you are sure that all the bolts have been correctly tightened must you drive the car, I would take it for a short drive first to make sure all is ok then get the alignment checked as soon as possible. You may wish to replace the nuts on the A arms as they are Nyloc nuts, with a Nylon insert to stop them coming loose, also it is very important that they suspension nuts and bolts are tightened with the full weight of the car on them, if you don't then the bushes will be pre loaded with a twist in them and wear out very quickly.
The end result is a suspension that feels like a new car, mine does and I am very pleased with the effort, I hope you will be too.
Click to enlarge
Open nuts
Open top mount screw
lift car
remove tie rods
remove disks, calipers, abs sensor
remove spring and insert new shock
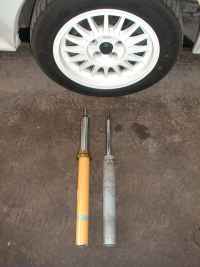
old and new shock
